
Ocean Wave Hearing · Corpus Christi, TX
How to Clean Hearing Aids at Home: Step-by-Step Guide
Wipe your hearing aids daily with a soft, dry cloth, clear wax from the openings with a soft brush, and keep them away from water and household cleaners. Regular home cleaning plus professional checkups help keep sound clear and extend their life.
By Ruben C. Cavazos, Jr., MS, HIS · Hearing instrument specialist, Ocean Wave Hearing, Corpus Christi
Quick answer: Wipe your hearing aids daily with a soft, dry cloth, clear wax from the openings with a soft brush, and keep them away from water and household cleaners. Regular home cleaning plus professional checkups help keep sound clear and extend their life.
Hearing aids are designed to improve your daily communication, but like any electronic device worn close to your body, they need regular care. Earwax, moisture, dust, and debris can affect sound quality and reduce the performance of your device.
Learning how to clean hearing aids properly at home can help maintain clear sound, extend the life of your hearing device, and reduce the chances of unnecessary repairs. Regular cleaning is one of the simplest ways to protect your investment and keep your hearing aids working properly.
In this guide, we explain how do you clean hearing aids, what tools you need, what mistakes to avoid, and when you should seek professional help.
Why Is Cleaning Your Hearing Aids Important?
Your hearing aids collect natural oils, sweat, moisture, and earwax every day. Over time, this buildup can block important parts of the device, including:
- Microphone openings
- Speaker or receiver
- Wax filters
- Ear tips or domes
- Battery contacts
Dirty hearing aids may cause problems such as:
- Lower sound quality
- Reduced volume
- Distorted or unclear audio
- Whistling sounds or feedback
- Device stopping unexpectedly
A simple daily cleaning routine can prevent many common hearing aid issues.
What You Need for Hearing Aid Cleaning
Before learning how to clean a hearing aid, prepare the right tools.
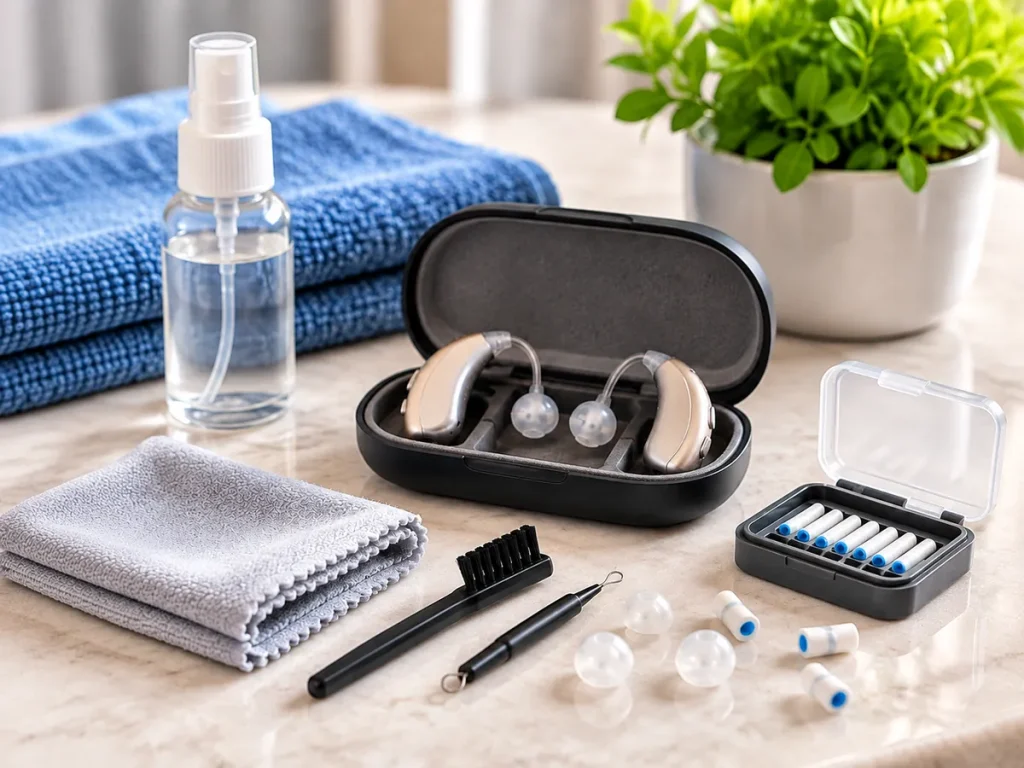
A basic hearing aid cleaning kit usually includes:
1. Soft Cleaning Brush
Used for removing wax and debris from small openings.
2. Microfiber Cloth
Helps remove fingerprints, oils, and moisture from the outer surface.
3. Wax Pick or Loop Tool
Useful for carefully removing buildup around hard-to-reach areas.
4. Hearing Aid Dryer or Dehumidifier
Helps remove moisture trapped inside the device.
5. Replacement Wax Filters
Needed when wax guards become blocked.
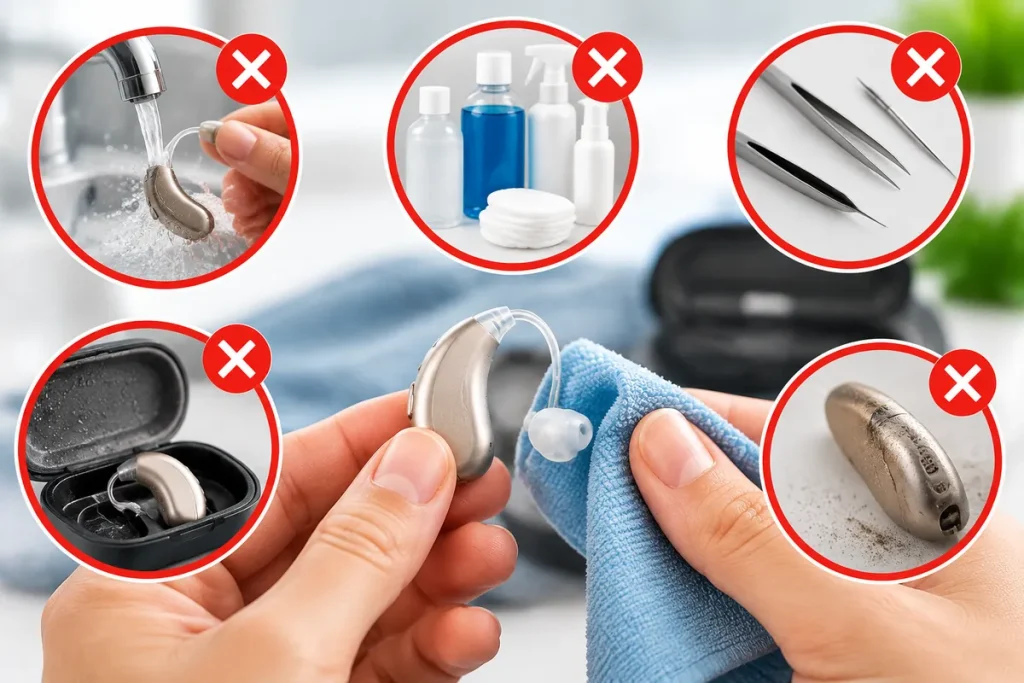
Avoid using water, household cleaners, or sharp objects because they can damage sensitive hearing aid components.
How Do You Clean Hearing Aids Step by Step?
Step 1: Wash and Dry Your Hands
Before touching your hearing aids:
- Wash your hands thoroughly
- Dry them completely
- Work on a clean surface
Moisture from wet hands can enter small openings and damage the device. The NIDCD also advises keeping hearing aids away from heat and moisture, and notes that earwax can damage a hearing aid.
Step 2: Turn Off Your Hearing Aid
Before cleaning:
- Switch off your hearing aid
- Remove disposable batteries if applicable
- Open the battery compartment
This makes cleaning safer and prevents accidental damage.
Step 3: Wipe the Hearing Aid Exterior
Use a soft, dry microfiber cloth to gently wipe:
- Outer shell
- Ear hook
- Dome
- Tubing
- Battery door
Do not use water or alcohol wipes unless specifically recommended by your hearing professional.
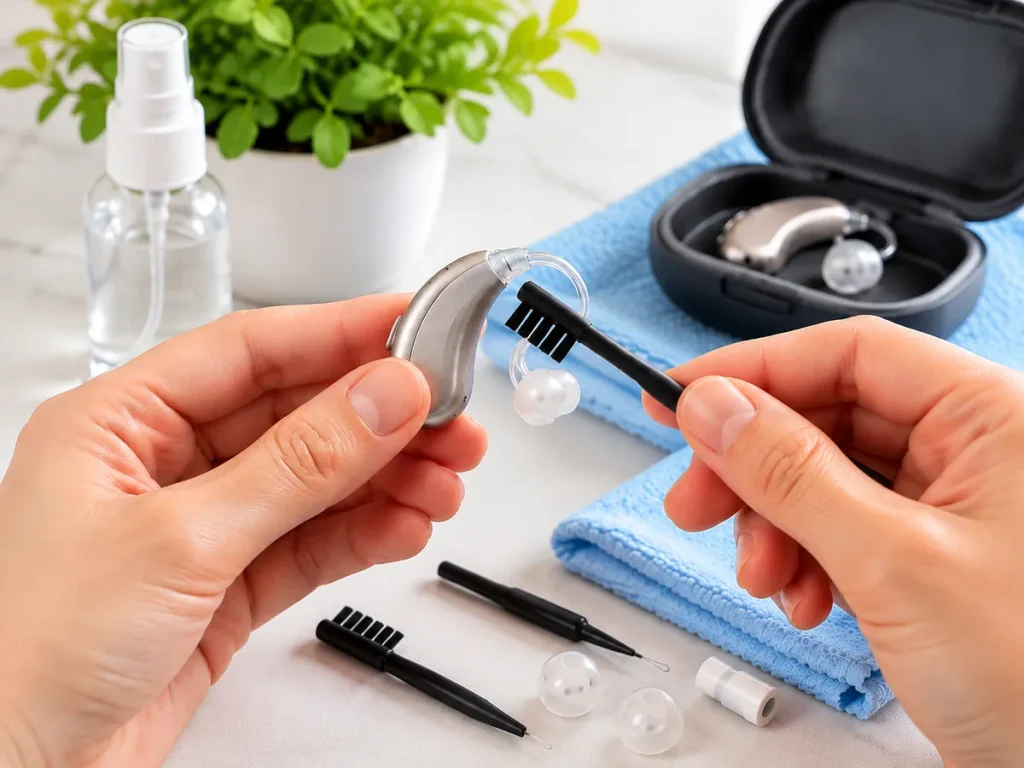
Step 4: Remove Earwax From Hearing Aids
Earwax buildup is one of the most common reasons hearing aids lose performance.
To remove earwax from hearing aids:
- Hold the device with the speaker side facing downward.
- Use a cleaning brush gently.
- Remove visible wax around the receiver and dome.
- Avoid pushing debris further inside.
Never use needles, pins, or sharp objects because they can damage internal parts.
Step 5: Clean the Microphone Opening
The microphone collects outside sounds, so keeping it clear is important.
Use:
- Small hearing aid brush
- Manufacturer cleaning tool
Gently brush the microphone ports to remove dust and debris.
Blocked microphones can make sounds seem quieter or unclear.
Step 6: Check and Replace Wax Filters
Many modern hearing aids include wax guards that protect internal components.
Check your wax filter regularly.
Replace it if you notice:
- Visible wax buildup
- Reduced sound output
- Muffled hearing
A blocked wax guard is often a simple cause of hearing aid troubleshooting problems.
Step 7: Clean the Ear Dome or Earmold
The part that sits inside your ear collects the most wax.
For cleaning:
- Remove the dome if possible
- Wipe it gently
- Check the opening for blockage
If the dome becomes damaged, cracked, or uncomfortable, replace it.
Step 8: Store Hearing Aids Properly Overnight
Proper storage is an important part of hearing aid care.
Every night:
- Place hearing aids inside their case
- Keep them away from humidity
- Use a hearing aid dryer if recommended
- Keep battery doors open if using disposable batteries
Moisture is one of the biggest causes of hearing aid damage.
Common Mistakes to Avoid When Cleaning Hearing Aids
1. Using Water
Hearing aids contain sensitive electronic components. Water exposure can cause permanent damage.
2. Using Alcohol or Strong Chemicals
Harsh cleaning products may damage the protective coating.
3. Cleaning With Sharp Objects
Pins, needles, and similar tools can damage microphones and receivers.
4. Ignoring Moisture
Even small amounts of moisture can affect performance.
5. Waiting Until Sound Quality Drops
Regular maintenance prevents problems before they happen.
Signs Your Hearing Aid Needs Cleaning
Your hearing aid may need cleaning if you notice:
Muffled Sound
Wax buildup may be blocking sound transmission.
Lower Volume
A clogged receiver or wax filter could be the reason.
Feedback or Whistling
Improper cleaning or blocked components may contribute.
Intermittent Sound
Battery contacts or internal moisture may be affecting performance.
Taking care of your hearing aids also means understanding how to use them safely. If you have concerns about hearing aid safety, read our guide on whether hearing aids damage your hearing to learn more about common misconceptions and proper hearing aid use.
Why Do a Few Minutes of Daily Care Matter?
Knowing how to clean hearing aids is essential for maintaining clear sound and protecting your device. A few minutes of daily care can help prevent common problems, improve performance, and extend the lifespan of your hearing aids.
Regular cleaning combined with professional checkups ensures your hearing aids continue supporting your communication and quality of life.
If you need help choosing, maintaining, or adjusting your hearing device, the hearing specialists at Ocean Wave Hearing can help you find the right solution.
Frequently Asked Questions
You can clean hearing aids at home by wiping the exterior with a dry cloth, brushing away wax and debris, cleaning microphone openings, and replacing blocked wax filters.
No. Water can damage internal electronic components. Use a dry cloth and hearing aid cleaning tools instead.
Most hearing aids should be wiped daily and inspected regularly for wax buildup and moisture.
It is best to avoid alcohol-based products unless approved by your hearing aid manufacturer.
Yes. Excess earwax can block receivers and filters, affecting sound quality and device performance.
Sources
- Hearing Aids, National Institute on Deafness and Other Communication Disorders (NIDCD), NIH